Using Binary Site Suitability Analysis to Explore Potential Hospital Locations
This tutorial will walk you through the steps to perform a binary site suitability analysis for the state of Illinois. As geographers, we all understand the importance of location when determining the overall success or failure of a hospital in meeting the needs of a community. In order to determine the best possbile location for a hospital, a methodology is needed to allow for the consideration of many possible factors. Binary site suitability is one of many ways to classify areas of Illinois as being suitable for another hospital to try and determine the best possible location. This tutorial introduces some of the concepts used in binary site suitability, starting with detailed instructions and gradually allowing for more independence in the process. ArcGIS Pro is required to complete the tutorial.
Data Sources
This tutorial will use the following data, criteria, and justification for site selection:
- Hospital Locations: Hospitals should not be located near other hospitals unless the population is large enough to warrant multiple healthcare providers.
- Major Roads: Access to hospitals requires easy access to major roads in order to lower travel times in the event of emergencies.
- Urban Areas: Hospitals should be located near urban centers, to provide homes for the work force, access to public utilities, and serve as many people as possible.
- Beds / Capita by County: Some regions have a greater amount of hospital resources allocated to them per the general population. Beds will serve as a proxy for the amount of hospital resources allocated.
All necessary data is provided in the following geodatabase, with one more dataset to be chosen and supplied by the user: HospitalSiteTutorial.gdb
Preparation of Hospital Locations
- Open a new ArcGIS Pro project, saving and naming as desired.
- In the Catalog pane, click Favorites, then Add Item, then Add Folder
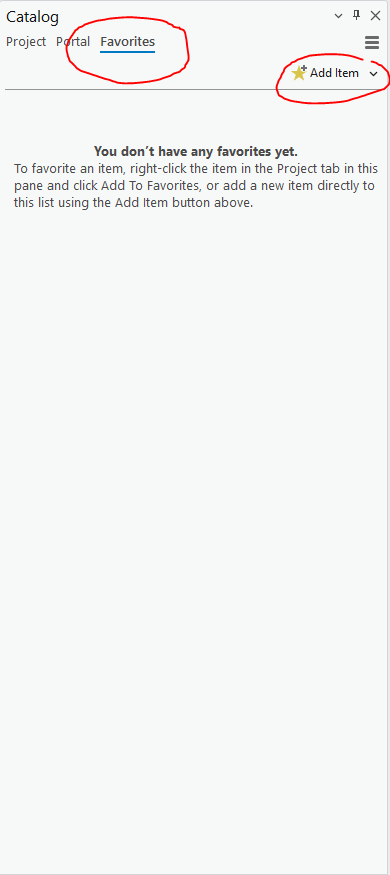
- Navigate to where you downloaded the geodatabase and add the containing folder.
- The folder should now appear in the Catalog pane. Expand the folder and the HospitalSiteTutorial geodatabase.
- Inside are 4 layers. Add the layer titled IllinoisHospitals to the map.
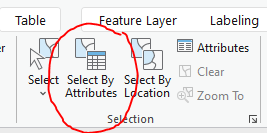
- We need to limit our selection of hospitals to those who serve the general public for a wide variety of needs. For our purposes, we will define that as Critical Access and General Acute Care hospitals. In the ribbon, click the Select by Attributes button.
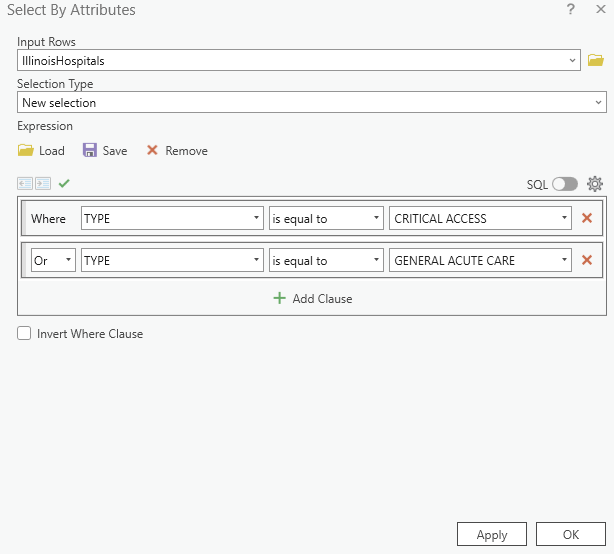
- Create a selection that selects only hospitals that have the types CRITICAL ACCESS or GENERAL ACUTE CARE. It should look like the following image:
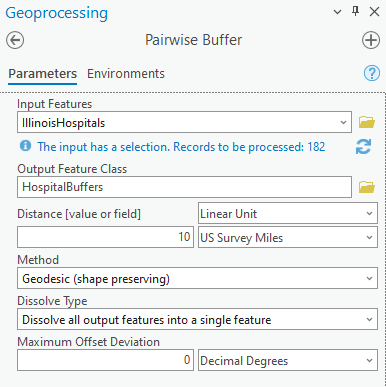
- We now need to create buffer zones representing the undesirable areas for another hospital, since one exists nearby. Go to the Command Search at the top of the page. Enter “Pairwise Buffer” and hit Enter on your keyboard.
- Set the parameters for the tool as follows:
- Click Run.
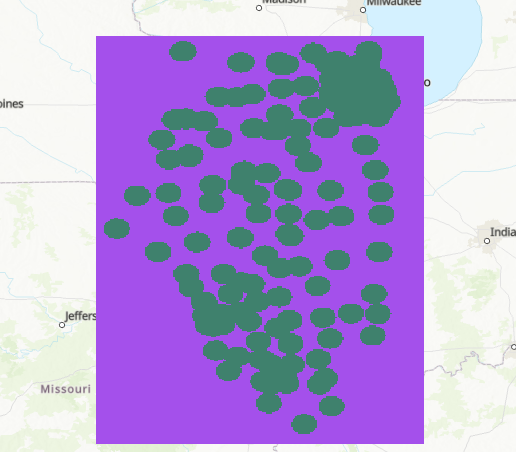
- Buffers are added to the map.We will now convert these polygons into a raster dataset for combining with other layers.
- Add the Counties layer from the HospitalSiteTutorial geodatabase to the map.
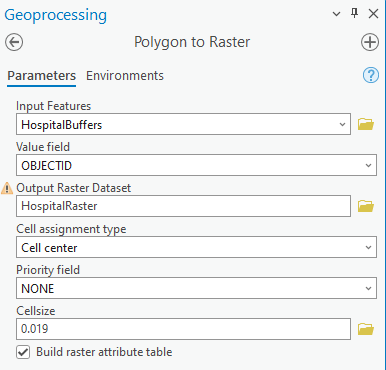
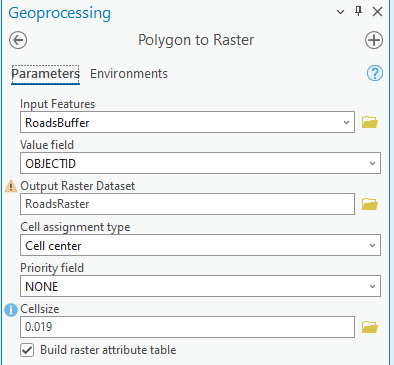
- Go to the Command Search again and enter Polygon to Raster and hit Enter on your keyboard.
- Configure the tool as follows:
- Additionally, click Environments and set the Processing Extent to Counties. Click Run.
- Turn off the IllinoisHospitals and HospitalBuffers in the Contents pane.
- Cells within the buffer zones have a value of one, while cells outside have NoData values.
- Finally, we can reclassify the raster so values outside the buffers have a value of 1, indicating they are desirable and increasing the overall score when an area has that cell.
- Go to the Command Search again and enter Reclassify and hit Enter on your keyboard. Set the parameters for the tool as follows:
- Click Run.
- The output should look like this:
- Remove the HospitalRaster from the map and then turn off HospitalReclass so it is no longer visible.
Preparation of Major Roads
- Add the IllinoisRoads layer to the map document.
- We now need to remove the interstates from the roads, since hospitals and other businesses usually cannot be accessed directly from the interstate.
- I in the RTTYP column stands for interstate. Create a selection query similar to before that selects all roads except interstates. It should look like this:
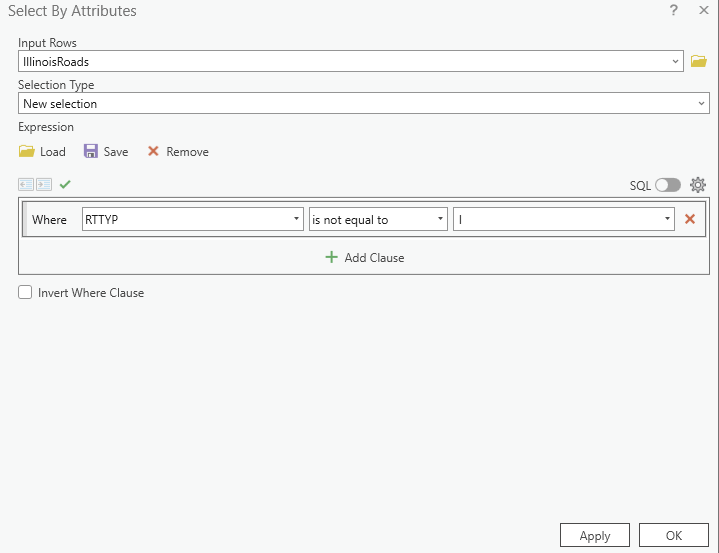
There are other types of roads that probably should not be included in this selection, however for this tutorial we will operate under this limited assumption. Feel free to adjust as desired.
- Apply the selection. Next we need to create another buffer containing all locations within one mile of the major roads. Create another buffer, this time setting the parameters as follows:
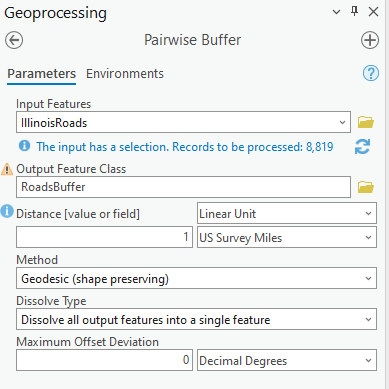
- Click Run and the buffer is added to the map document.
- Once again we must create a raster from the buffer, using the same Polygon to Raster tool. Set the parameters as follows, and don’t forget to set the Processing Extent to Counties:
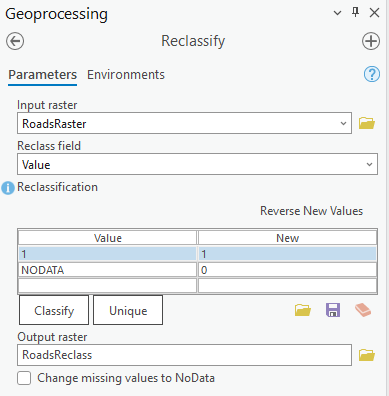
- With the raster, we now must reclassify the desirable values as 1 and the undesirable values as 0. In this case, being close to the roads is desirable, so all that needs to be changed using the Reclassify tool are the NoData values, with the parameters as follows:
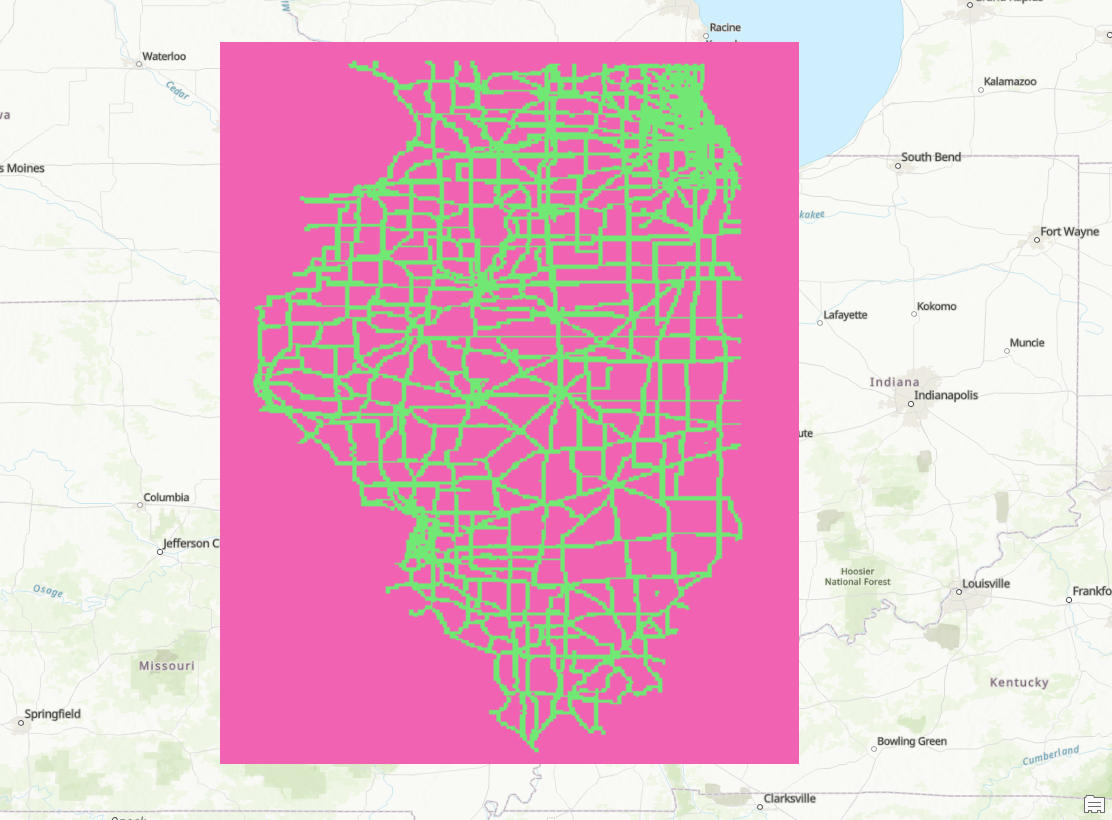
- Run the tool and the reclassed raster is added to the map. Remove all layers except for Counties, RoadsReclass, and HospitalReclass. Ensure that both Reclass layers are turned off.
Preparation of Urban Areas
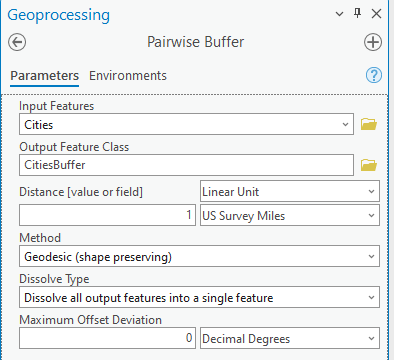
- Hospitals should be located either in urban areas or within proximity to them. Add the Cities layer to the map document.
- Create a 1 mile buffer around the cities with the following parameters:
- Convert the buffer to a raster with the following parameters, once again using Counties for the Processing Extent:
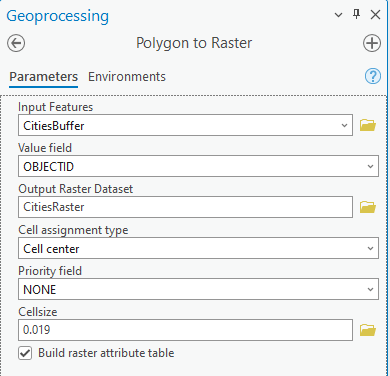
- Reclass the raster with the buffers as having values of 1 and the areas outside the buffers having a value of 0:
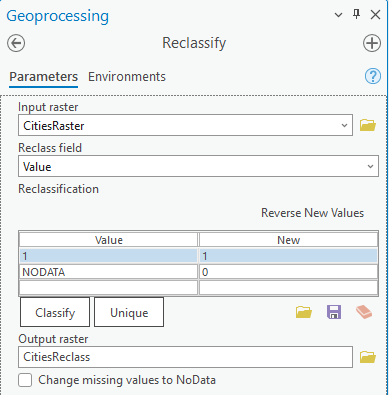
- With the reclass added to the map, remove the Cities, CitiesBuffer, and the CitiesRaster from the map. Then turn off the CitiesReclass layer.
Preparation of Beds / Capita
- The counties layer has already been spatially joined with the hospitals to acquire the total sum of beds for all of the hospitals contained within each county in the BEDS field. Additionally, each county has the population for that county contained in the AMPVE001 field. We will use these to calculate beds per capita.
- Open the attribute table for the Counties layer by right clicking on the layer.
- In the attribute table window, click Add Field.

- Create a new field with the following attributes:

- At the top of the page, click Save to finish adding the new field.
- Return to the attribute table and right click on the new BedsPop column, then select Field Calculate.
- Enter the following expression in the BedsPop = parameter and click OK:
!BEDS! / !AMPVE001! - Once the field has been made, right click on the field and click Sort Ascending.
- Note that 25 counties have 0 for the BedsPop field. This means there were no hospitals within those counties. For our purposes, we would like our hospital to be located in one of the lowest 40 counties for beds per capita, in the hopes of improving the ratio.
- Select the top 40 by clicking on the 1st row, then holding down shift and clicking on the 40th row. This will select all records in between.
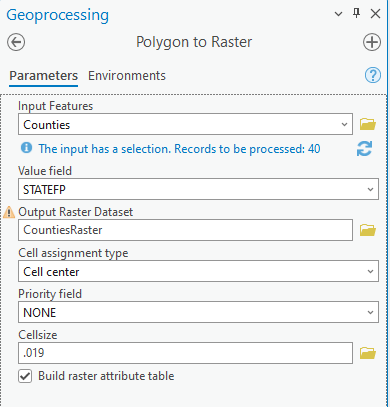
- With this selection, convert the counties to a raster. This is slightly different than the previous conversions, since there are multiple features rather than one buffer. As such we need to set the Value to a field common amongst all counties. In this case we will use the StateFP field, although it can be anything that is the same for all the selected counties. Don’t forget to set the Processing Extent to Counties once again:
- Reclass the raster with the NODATA values as 0 and undesirable while the counties in the bottom 40 are 1 and will add to the overall score:

- Remove the CountiesRaster from the map, and turn off the CountiesReclass layer.
Preparation of Additional Criteria (Optional)
- Now that all 4 layers have been prepared, this tutorial challenges the user to come up with one more criteria to be used in the site selection process.
- Using a similar method to previously outlined processes of converting to raster and reclassifying, use another dataset (or dataset already used in this tutorial) to create an additional criteria. Some possible examples include
- Lowest 10 counties for beds per capita, or counties with no hospitals
- Demographic characterists such as race or income
- Urban vs Rural county classifications
- When reclassfying the raster, make sure to use a field that will result in values of 1 after converting to raster, such as STATEFP.
- Additionally, set the parameter for Processing Extent to the Counties layer, to ensure that the raster is consistent with all the other layers used.
Performing the Final Site Suitability Index Creation
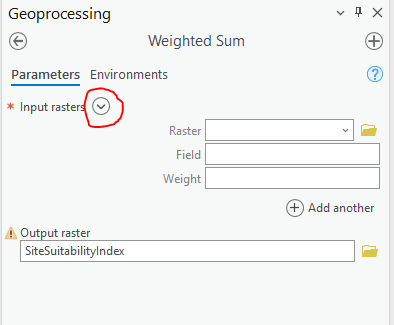
- In the Command Search at the top of the page, type in “Weighted Sum” and hit the Enter key.
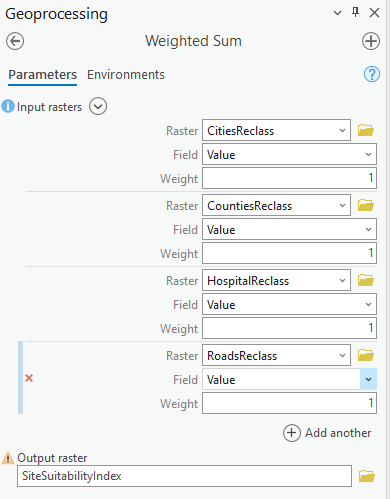
- In the tool, click the drop down button and add all the reclassed rasters to the tool, including the optional one if it was performed.
- Set the Output raster to SiteSuitabilityIndex.
- The parameters for the tool should look like this:
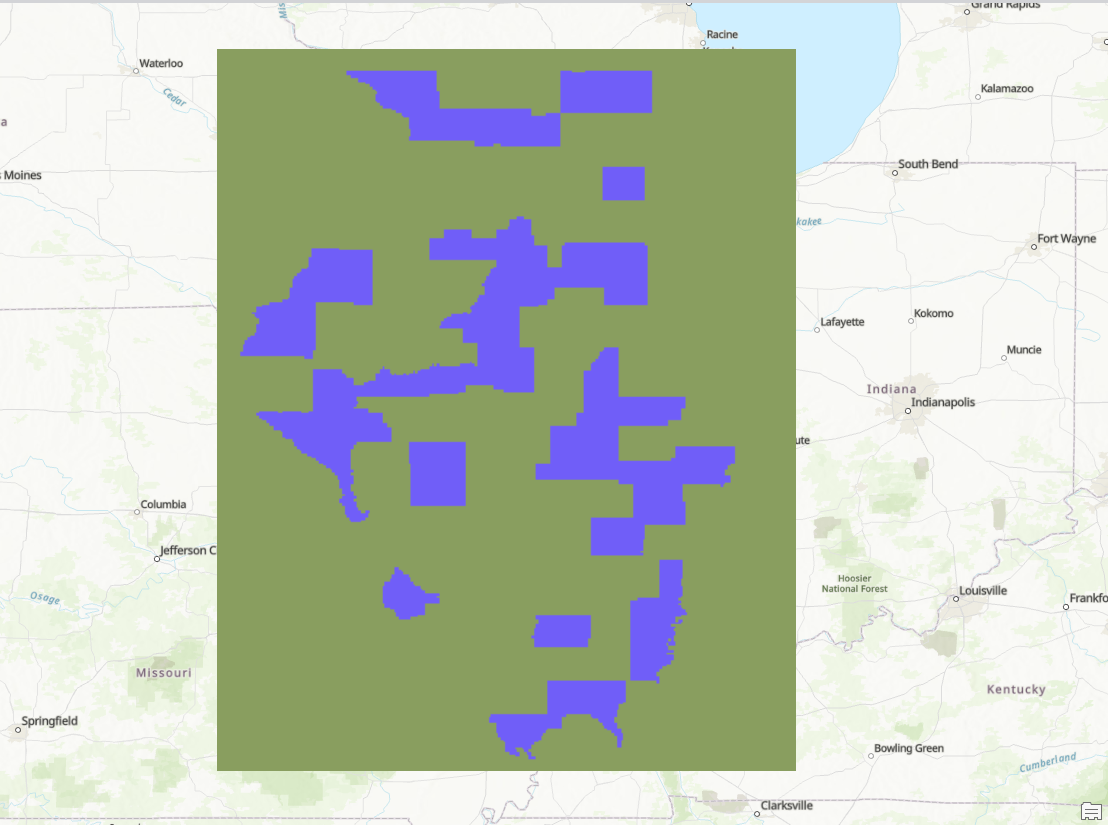
- Click Run and the weighted sum output is added to the map. Areas with higher scores met more of the desired criteria when compared to the areas with lower scores.
- This study was limited to the extent of Illinois, so we should clip the extent of the raster to the Illinois border.
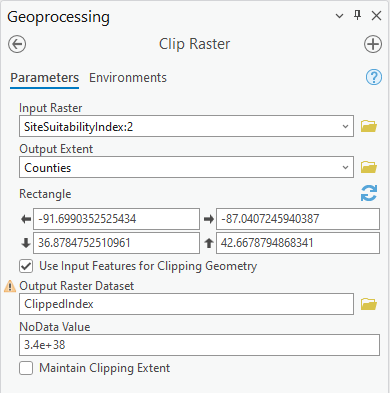
- In the Command Search, type “Clip Raster” and hit the Enter key.
- Complete the parameters as follows and click Run:
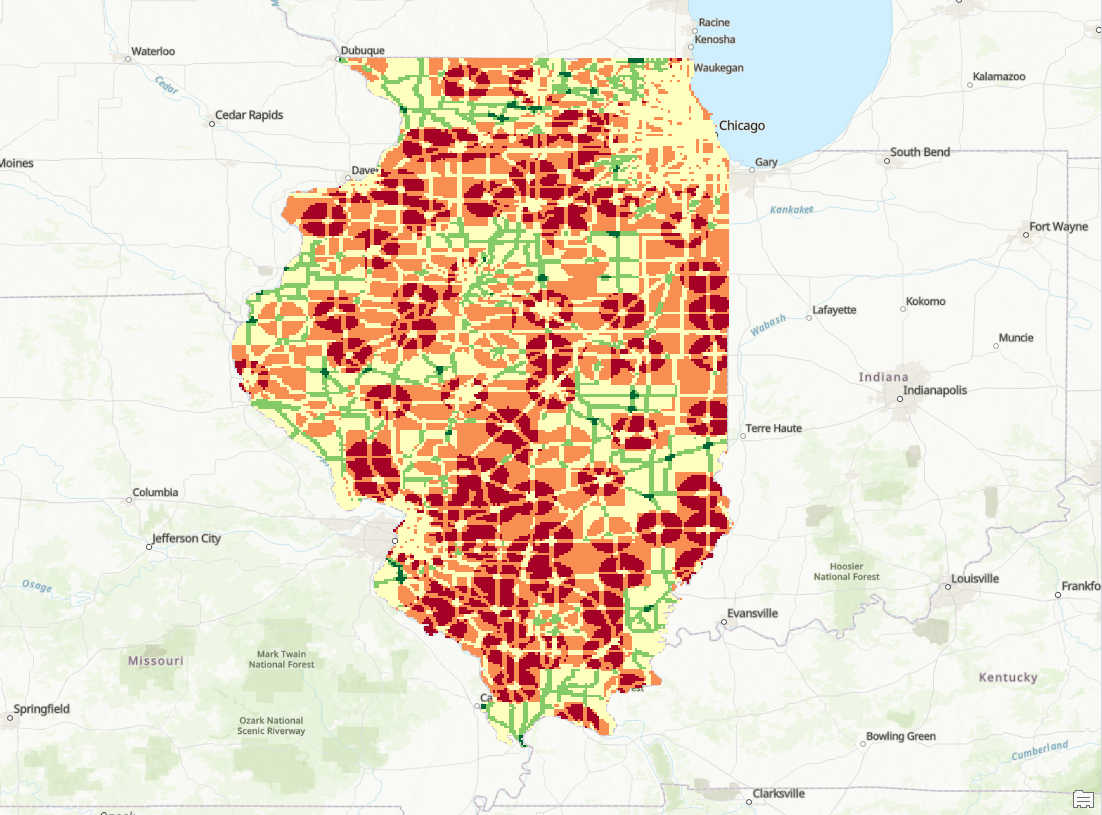
- The final output should look like this (May vary if an additional criteria was used):
Wrapping Up
- Create and export a map of your site suitabiliy index.
- Write a paragraph identifying two locations where you would place a hospital based on this model.
- Identify one of the problems with this method, or suggest an additional criteria not mentioned that could improve the results.